Extracting Vector Data from Digital Orthophotos by Digitization
Lab Materials
Download this: Lab Materials
Lab Content
Objective
Extracting Vector Data from Digital Orthophotos
Procedure
Creating A New Shapefile In ArcMap
Pull up watershed.img from the previous lab in ArcMap.
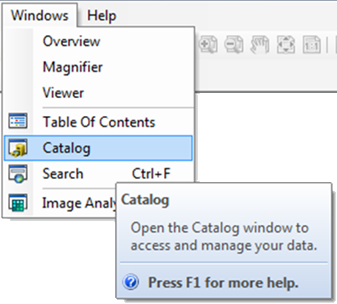
Open the catalog in ArcMap by clicking on the tab on the right of the program window if it is open already or by clicking the Windows dropdown and selecting Catalog.
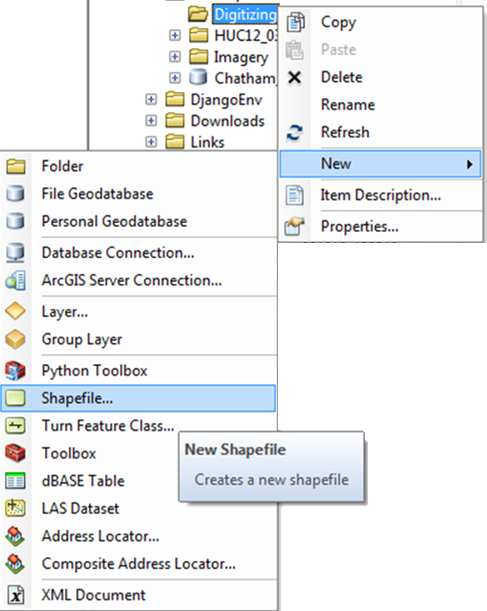
Once you have the catalog opened up navigate to the folder where you want your new shapefile saved to, right click on that folder, hover over New, and then click shapefile.
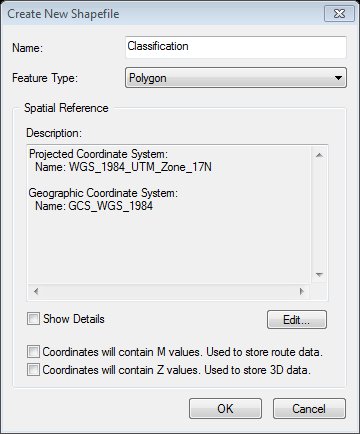
A dialog box will open and the settings need to be changed. You should rename the shapefile to something meaningful and the Feature Type should be changed to polygon. Spatial Reference needs to be set for this file and we are going to set it to match that of the image since that is what we are digitizing.
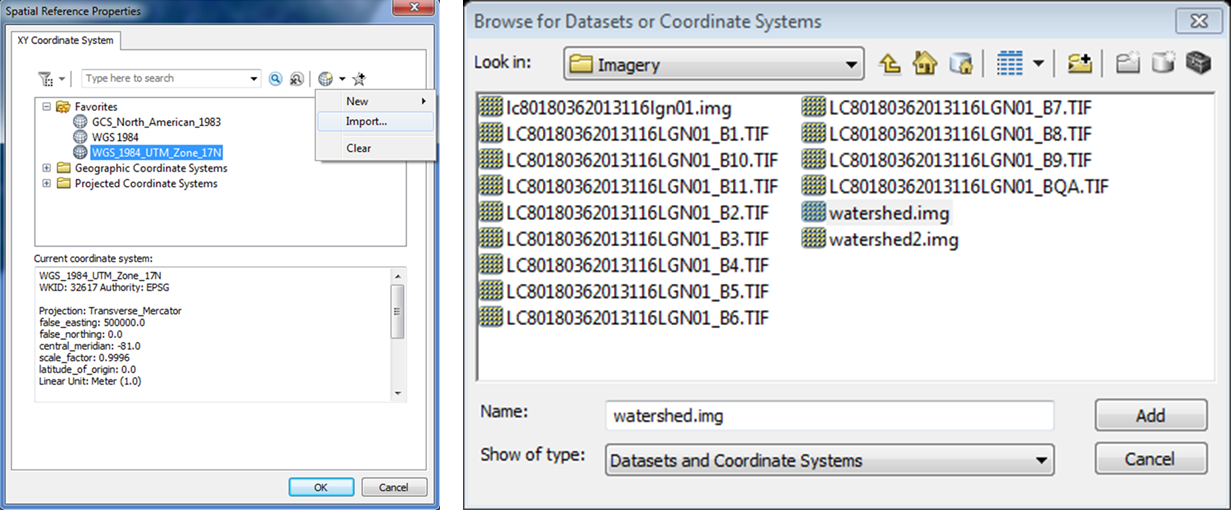
To change Spatial Reference click on edit and a new window will open. Click on the Globe with a Star on it at the top right of the window and then import. On the import menu navigate to watershed.img and click Add so that the new shapefile will have the same exact Spatial Reference.
Before we can start creating features we need to add a new column called class to the attribute table of the shapefile we just created.
To do this open the attribute table of the shapefile, click on the top left icon of the attribute table, and then click Add Field.
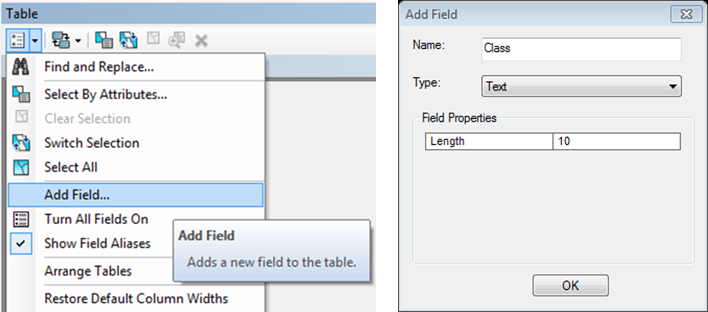
This new field needs to be given a meaningful name like class, and a text field with a length of 10. We will use length of 10 because none of our class names are longer than 10 characters.
Now we can start the digitization process.
Digitizing In ArcMap
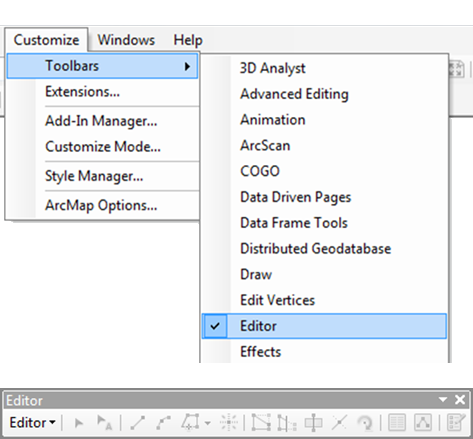
To start creating features the editor toolbar needs to be turned on if it is not. To turn it on right click on the main toolbar window and click editor or click on the Customize dropdown –> Toolbars –> Editor. It should have a check mark next to it when turned on.
In the editor window click on editor and then Start Editing. This begins the editing process.
To start creating features click on the last button on the editor toolbar which will make the create features window open on the right of the screen.
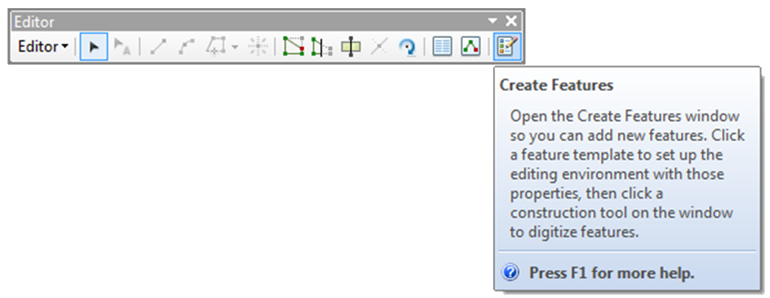
Click on your shapefile that you created and then click on Polygon at the bottom. This allows the creation of new polygon items in your shapefile.
Now you will create new features by clicking on the image to drop points and creating polygons around the different land cover classes. On the last point of the polygon outlining a class double click where the point goes and that will finish the polygon.
Each time a shape is created the attribute table needs to be updated and have the class of what the shape represents added to the class column we created earlier.
Once you have digitized multiple objects click on the editor dropdown on the Editor Toolbar and then click Save Edits. This will save everything you have done up to this point in case ArcMap decides to crash. Do this multiple times as you are digitizing.
Following this process classify the entire watershed.img into the following four classes:
- Water
- URS
- Pasture
- Forest
Once you have digitized the entire image click on the editor dropdown on the Editor Toolbar and then click Save Edits and then Stop Editing.
Calculate the area of each class in Square Meters, Square Kilometers, and Acres. The easiest way to calculate area is to create a new field and use the calculate geometry. Display these results as a table on your map composition.

On your map composition create another data frame that contains watershed.img so that you can show the original image in a smaller frame on the map layout to see what the classified image is referencing.