Unsupervised Classification
Lab Materials
Download this: Reference Image
Lab Content
Objective
To perform Unsupervised Classification of a Multispectral Image
Procedure
Performing Unsupervised Classification In Erdas Imagine
Open up the image ‘watershed.img’ that you created from a previous lab in a viewer.
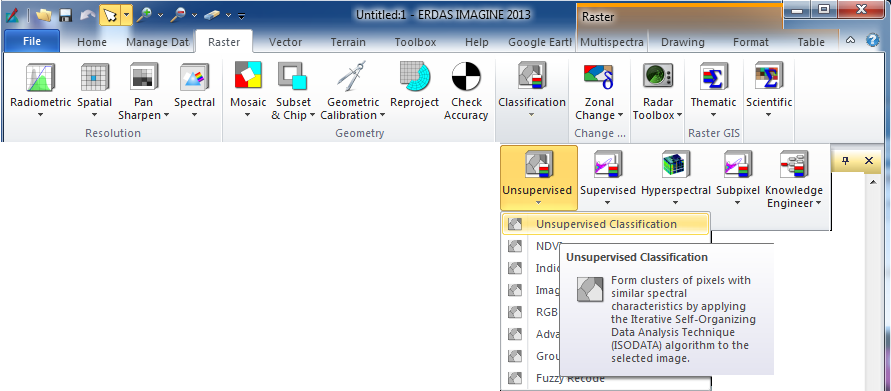
Click on the Raster tab –> Classification –> Unsupervised button –> Unsupervised Classification
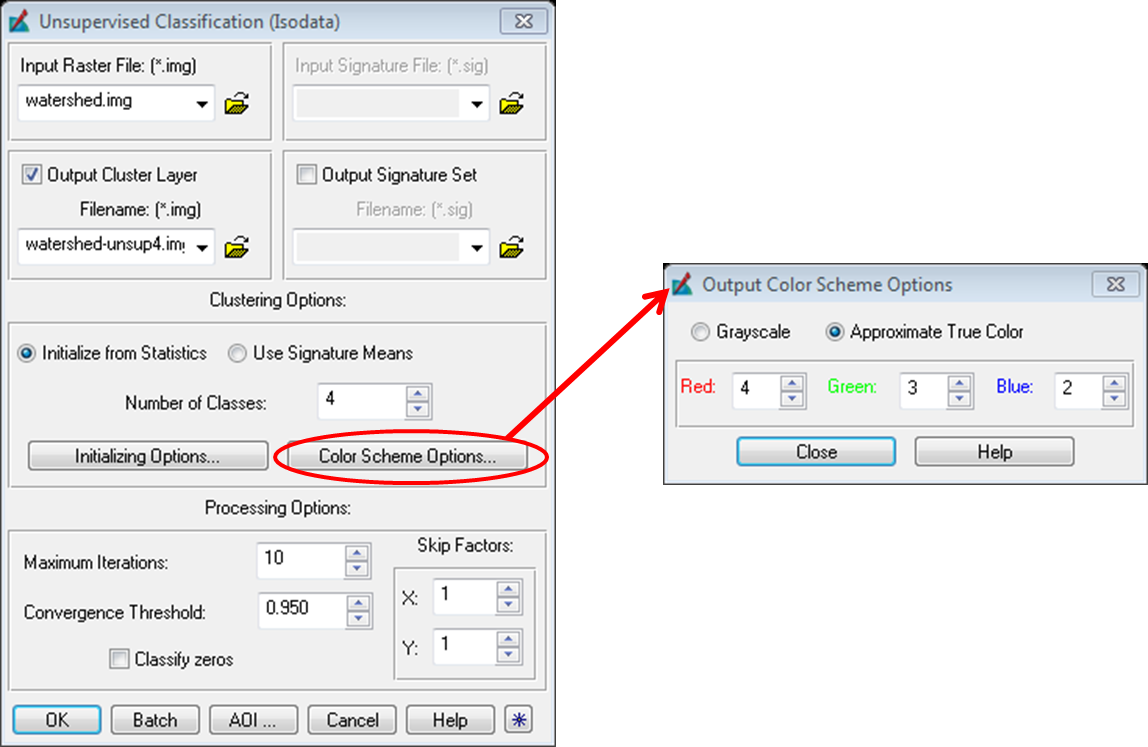
For the input raster field navigate to ‘watershed.img’
For the Output Cluster field navigate to the folder where you want the output saved and give it the name ‘watershed-unsup4.img’
Choose 4 for the number of classes (as you classified this image into 4 classes using digitization i.e. URS, Forest, Pasture, and Water)
Click on color scheme options button and choose approximate true color
Leave processing options numbers as the default values
Make sure your windows match the following image and click on OK
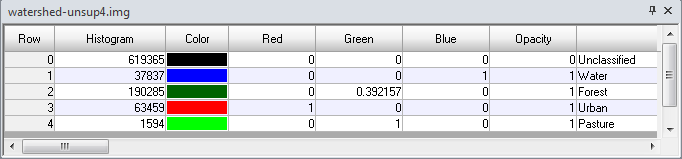
After the processing is complete, open up the classified file ‘watershed-unsup4.img’. In the Table of Contents right click on the classified image and then Display Attribute Table.
Scroll to the right of the attribute table and type in the particular land cover class names and change their respective color by visual inspection of the map.
Save and close attribute table. Do a map layout of this image which is classified using unsupervised classification.
Experiment by doing an unsupervised classification of ‘watershed.img’ using both 8 and 20 classes.
Edit the attribute tables of these images to try and pull out as many classes as possible (many rows will have the same class and color assigned).
How many of the land cover types can you identify on both of these classified images? Be sure to include this in your lab report.
Create and include a map layout of both in your lab report.
- Write a lab report in which you
- Describe the principles underlying unsupervised classification and the concept of feature space plots
- Compare the results of the different Unsupervised classifications that you performed
- Elucidate the power and merits of the technique of Unsupervised classification
Performing Accuracy Assessment In Erdas Imagine
Open up the image ‘watershed_unsup4.img’ that you created in a viewer.
Click on the Raster tab –> Classification –> Supervised –> Accuracy Assessment.

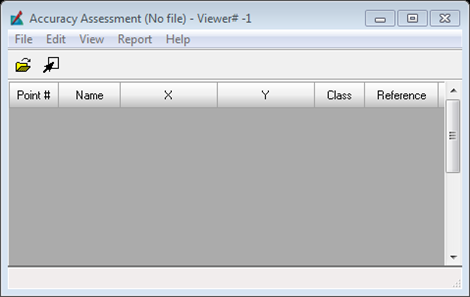
A new window will open which is the main window for the accuracy assessment tool.
In this new window Click on File –> Open and choose ‘watershed_unsup4.img’
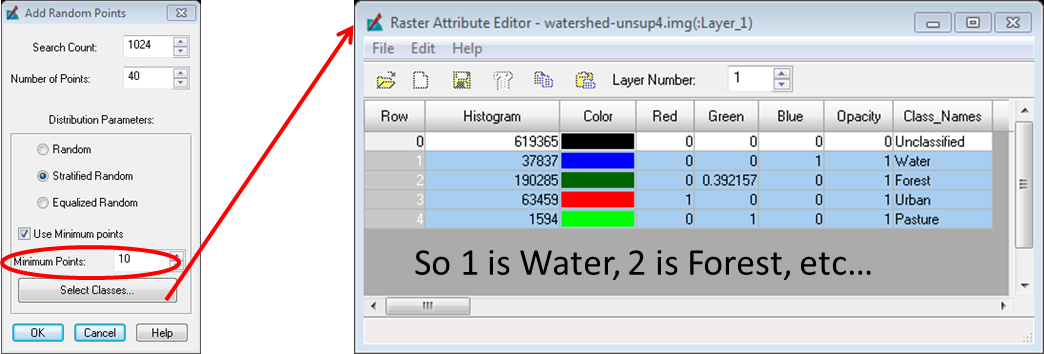
Click on Edit –> Create/Add Random Points
A new window will open to set the settings for the accuracy assessment. We want to perform a stratified random sampling so that we can have at least 10 random points for each class. If we have a minimum of ten points per class we need a total of 40 points all together.
Before we click OK check to make sure that Erdas is using the correct classes. To do this click on classes and select the classes that you want to use by holding shift and clicking on each one.
Once you have your classes selected make note of the number that each class is represented by, you will need these and then click OK.
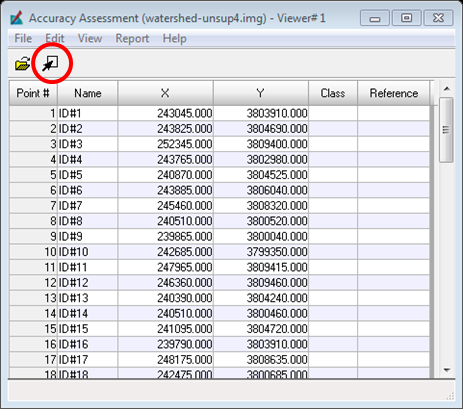
There are now 40 points listed in the Accuracy Assessment window and you will notice that the class field is empty, this is to prevent a bias when declaring the class that the point represents.
Now click View –> Select Viewer or the black arrow in the ribbon and click inside the viewer with the image in it.
Click View -> Show All and this will show all of the random points on the map.
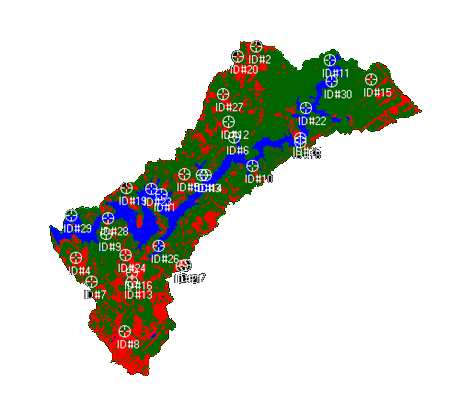
- Note: You can change the colors of the markers for the points based on if the reference field is populated or not by
going to View –> Change Colors on the Accuracy Assessment Viewer as shown in the image below.

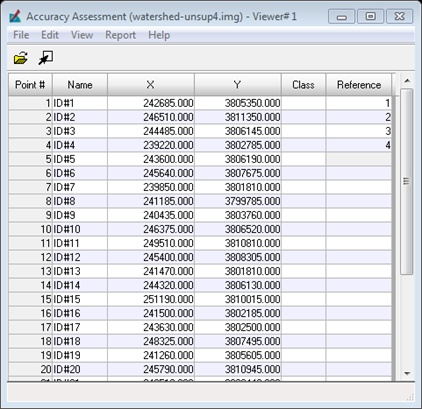
Now fill in the reference column with the number of the class that it represents. Compare your class to the reference data provided. To find each point more easily you can select the row of the point you are on and then click View –> Show Current Selection and it will just show the point you have selected. This will have to be performed for each point if doing it this way.
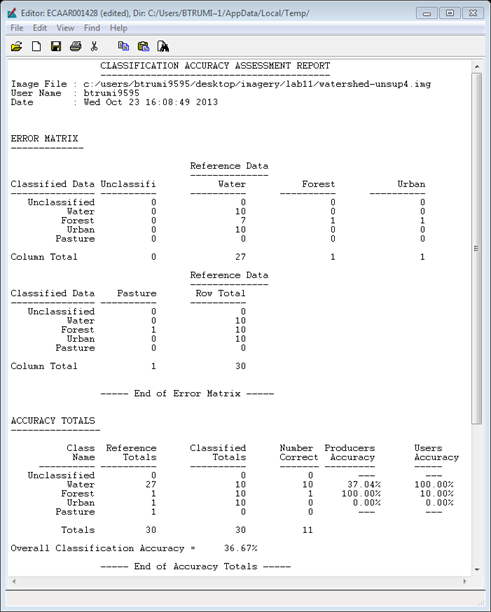
Once you finish with all of the points click on Report –> Accuracy Report and this will generate a report that contains Overall Accuracy, Producers Accuracy, Consumer Accuracy, Error Matrix, and K-statistic.
To save the random points click on “File” and then “Save table” which will save the table to the classified image that you are referencing.
Performing an Accuracy Assessment in ArcMap (Under Development)
- Open a new Map Document in ArcMap.
- Add the HUC12 watershed boundary shapefile and your four class unsupervised classification image to the map.
- Use the Raster to Polygon tool to convert your unsupervised classification image to polygons. Be sure that you do not simplify the output polygons.
- Use the dissolve tool on your new polygon shapefile and dissolve the polygons by type. Your resulting shapefile should have four polygons. One for each land cover class.
- In your dissolved polygon shapefile add a new short integer column named samples. Use the field calculator to set the value of all the rows to 25 in the sample column.
- Use the Create Random Points tool with the field set to your samples field. This will generate 25 random samples in each class and an output point shapefile containing 100 points.
- Use the Extract Values to Points tool with your four class unsupervised classification image and your sample point shapefile as inputs. This will transfer the land cover class under each point to the sample points.
- In your new point shapefile make a new short integer column named refclass.
- Enter editing mode. Zoom to each of your sample points and review the landcover class in the reference imagery and enter it in to the refclass column.
- Use the values for your sample point classes and your refclass column to create an error matrix.